
Table of contents
Admin Menu
We can see a button called “ Admin Menu, this works as a switch between that menu and the “ User Menu.
While we are in the “Admin Menu”, different buttons related to the menu in question will appear (some machines may not have this function).

• Reports: Allows access to all information and results generated by the customer machine or POS.
- Emptying operations
- Filling
- Withdrawals
- Transactions
- Changes
- ImaCash Logs
• Admin Cash: Allows you to manage the cash control machine.
- Movements
- Discrepancies
- Inventory
- Emptying operations
- Maintenance
• Settings: Allows ImaCash to be configured according to the needs of the “User”
• Purge BBDD: Completes a complete cleanup of the database from the indicated date backwards.
• Browser: Allows use within the ImaCash environment as if it were a browser.
Note: By default, administrator privileges are required to access this menu, and
you will need “User” and “Password” to access the different options.
Reports
Allows access to all information and results generated by the customer machine or POS.
• Transactions: You can find all transaction information between the dates and filters set in the search.
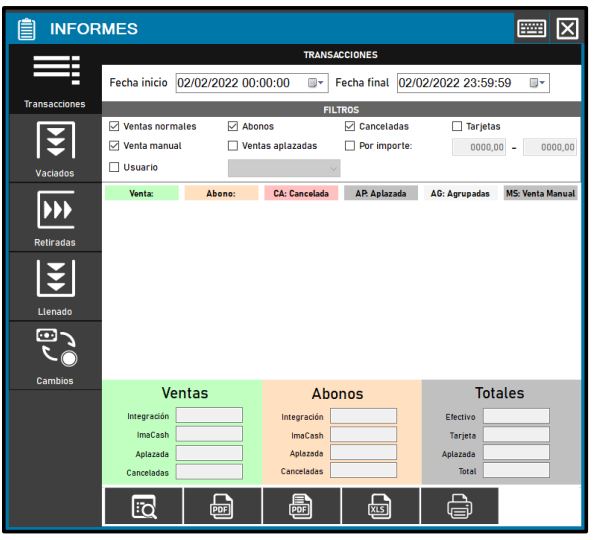
• Emptying operations: You can find all information about emptying operations between the dates set in the search.
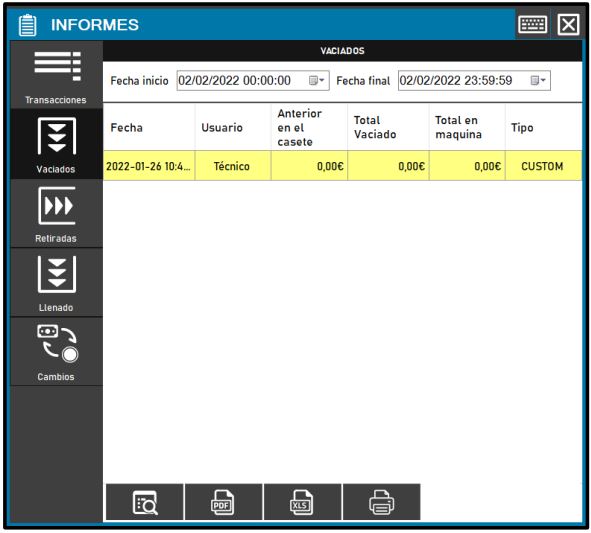
• Withdrawals: We can find all the information regarding those withdrawn between the dates established in the search.
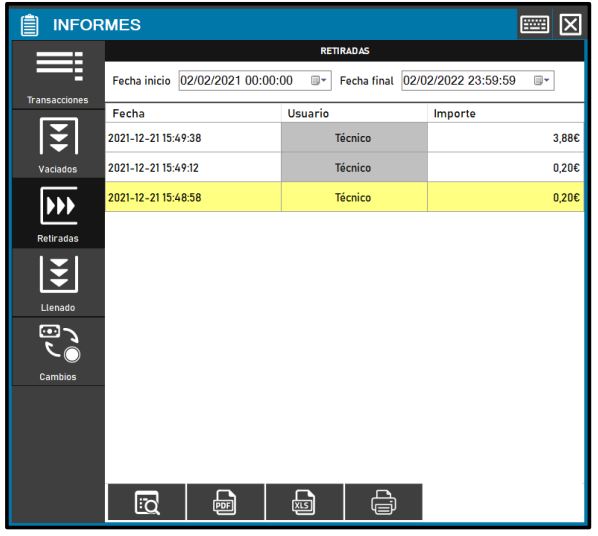
• Filling: We can find all the information regarding fillings between the dates established in the search.
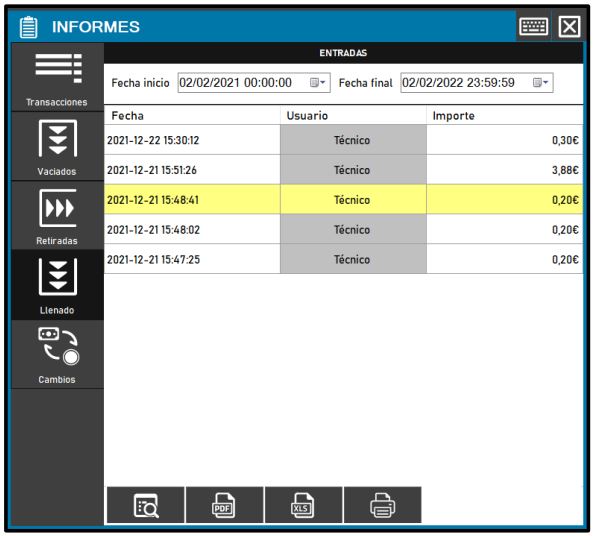
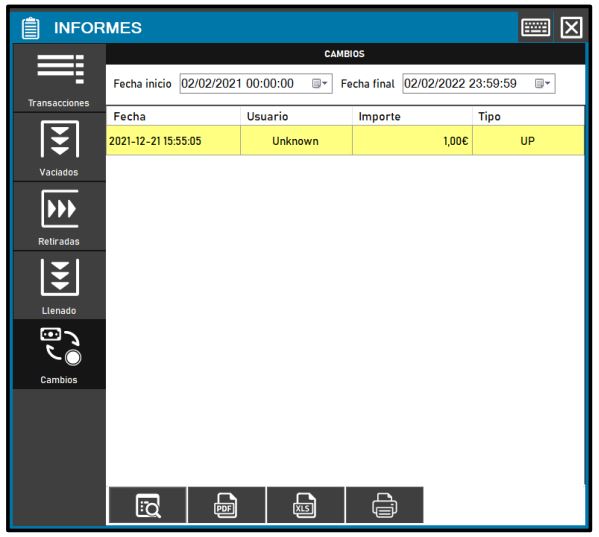
• Changes: We can find all the information regarding the changes between the dates established in the search.
Cash Admin – (Cash Administration)
It allows you to manage the cash control machine and some options may vary depending on the machine we have installed.
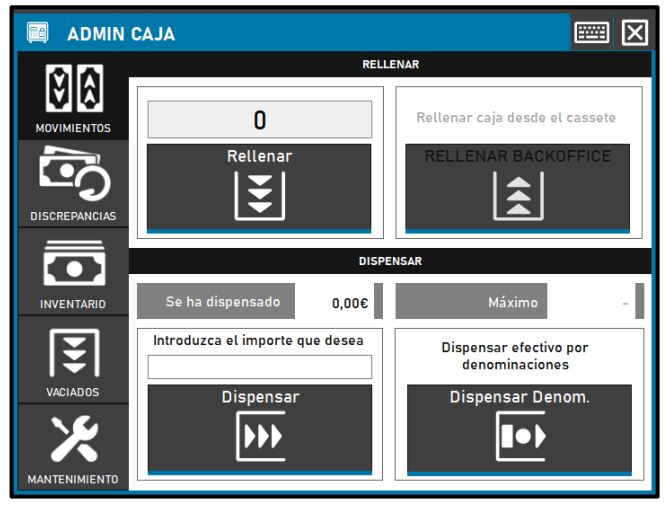
• Movements: We will have the option to refill or dispense cash into the machine manually.
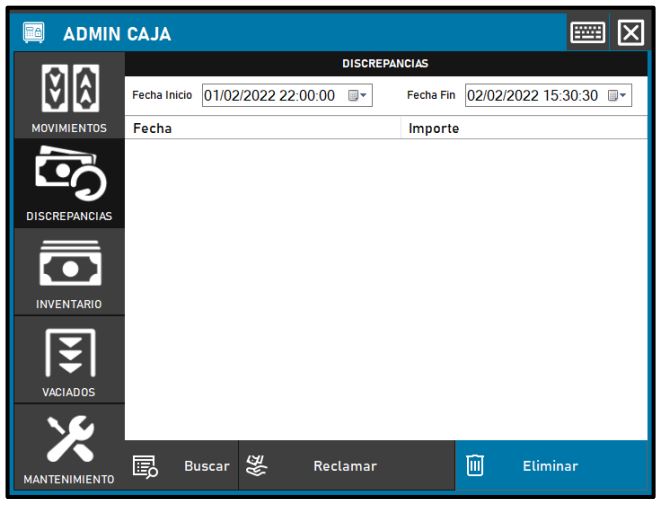
• Discrepancies: You can view cash return errors from the relevant machines or POS, claim them or delete them. On some machines this option you can access it from the Main Menu through the “Jams or “Discrepancies.
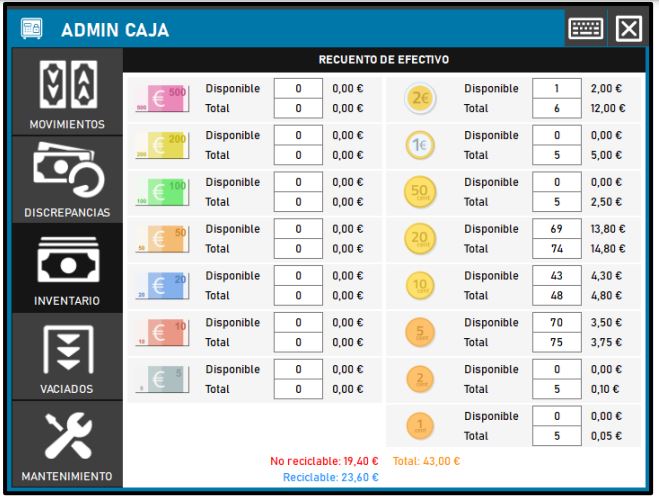
• Inventory: We can easily see how much money there is in total inside the cash control machine. We can find different information regarding the machine inventory:
- Non-recyclable: That cash that cannot be reused and/or requires the machine or is in the cassette / stacker.
- Recyclable: That cash that the machine can reuse for its operations.
- Total: The total quantity that exists in the machine at that moment.
• Emptying operations: It allows different emptying types for the cash control machine, some options may not appear exactly as shown in the image, because they depend on the cash control machine
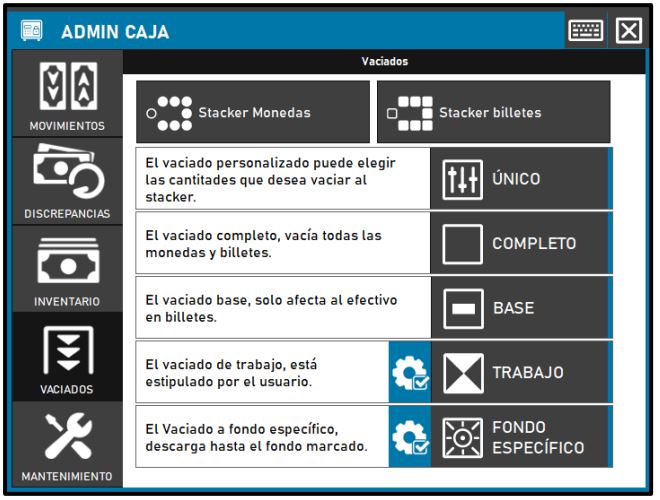
- Unique: The user determines what quantities they wish to empty.
- Complete: Empty the machine of coins and bills.
- Base: Empties only the bills.
- Job: Empties the quantity greater than the marked denomination. It is configured from the left button of the button.
- Specific depth: Empty until the quantity marked on the machine is left. It is configured from the left button of the button.
• Maintenance: Allows access to different maintenance options for the cash control machine. These options may vary depending on the machine installed.
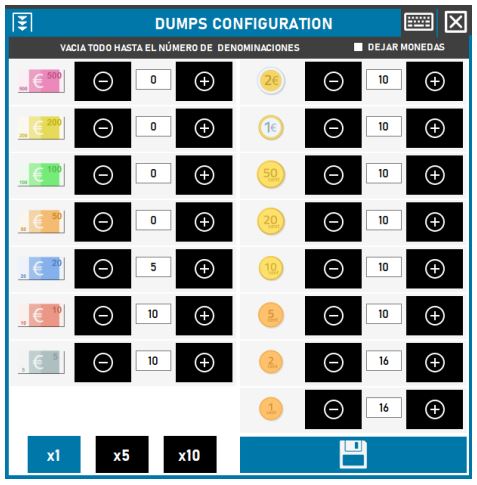
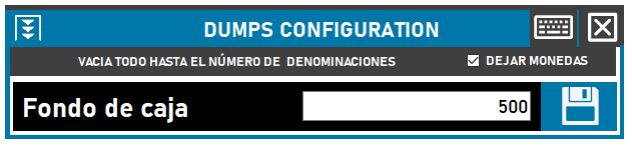
• Configuration Emptying operations: When pressing the configuration icon, the following windows will appear; the selected type determines the function to be performed.
- Work: Here we will mark all those minimum denominations that we want to remain available in the machine. If the machine allows it, we can check the option “Leave coins to only empty the bills.
- Specific: We will enter the quantity that we want to have in the machine. If the machine allows it, we can check the option “Leave coins so just empty the bills and it will try to get as close as possible.
Settings
Allows you to configure the ImaCash according to the needs of the “ User:
• General: Allows you to configure the ImaCash at a technical level:
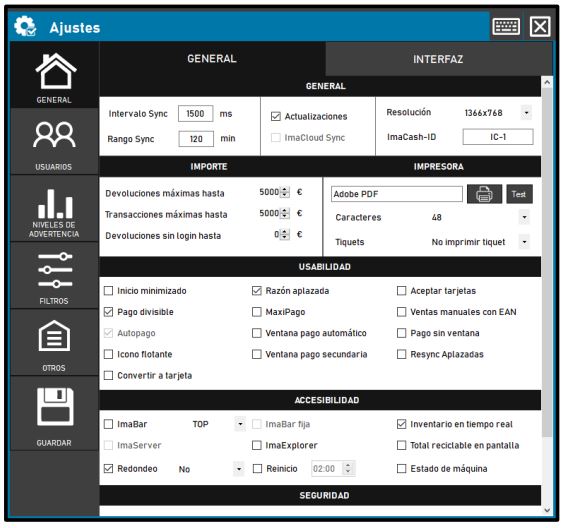
Next, we will explain the following submenus of the preferences in more detail:
• General:

- Sync Interval: Time it takes ImaCash to make a query to the server.
- Sync Range: When we perform a “Resync” all transactions carried out in that period of time will appear.
- Resolution: Allows you to configure the display of ImaCash and make it better adapt to the different resolutions of ImaCash
- ImaCash-ID: Allows you to put an identifier to ImaCash and thus be able to differentiate them.
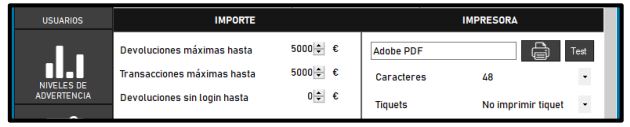
- Maximum returns up to: Set the maximum money that can be dispensed with returns.
- Maximum transactions up to: Sets the maximum amount of money that can be dispensed for general transactions.
- Returns without login up to: Configure the maximum money that credits can be dispensed without requesting login.
- Printer: Select the printer to print the tickets
- Characters: Maximum number of characters that the printer will have.
- Tickets: We have different types for printing that will appear by default during transactions.
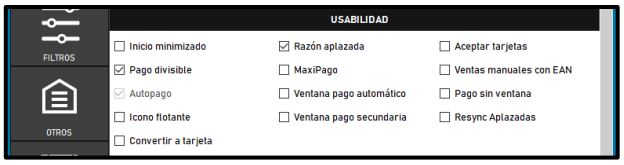
- Minimized Boot: Allows ImaCash to boot minimized.
- Divisible Payment: Allows the use of Divisible Payment.
- Autopayment: Automatically displays the sale window.
- Floating Icon: Displays a small scrollable icon to bring ImaCash to the foreground or background as needed.
- Convert to card: Displays an icon on the payment form to convert effective sales to card directly.
- Deferred reason: Allows you to put a concept in the deferred sales.
- MaxiPago: Maximize to pay and minimize at the end.
- Automatic payment window: Displays the payment form automatically when receiving a new sale.
- Secondary payment window: Displays a secondary information form so that the client can see the operation.
- Accept card payments: Allows you to accept showing card payments. These sales only appear if the integration allows it.
- Manual sales with EAN: Allows sales with barcode from manual sales. The codes created by the software must have this composition so that ImaCash recognizes it.
2 digits for “Local = 11000000000000000000
3 digits for “Cash = 00111000000000000000
6 digits for “Ticket = 00000111111000000000
1 digit for “Type = 00000000000100000000
4 digits for “Integers = 00000000000011110000
2 digits for “Decimals = 00000000000000001100
2 digits for “Control Code = 00000000000000000011
- Payment without window: Allows you to hide the payment screen (it is important that if you activate this option you also activate the Floating Icon).
- Resync Deferred sales: Allows Resync to be configured so it also deletes deferred-sales information. This operation cannot be undone and deletes the note information.

- ImaBar: Allows a minimal ImaCash bar to be placed at the bottom or top.
ImaBar fixed: (Disabled). - Rounding: Allows transactions to be rounded to avoid cent peaks.
- ImaExplorer: Show/Hide the browser function in ImaCash.
- Restart: Allows the program to automatically restart at a specified time if ImaCash is connected.
- Real-time inventory: Shows the “EYE” of the main menu, activating this option slows down the operation.
- Machine status: Allows you to view the errors of some machines
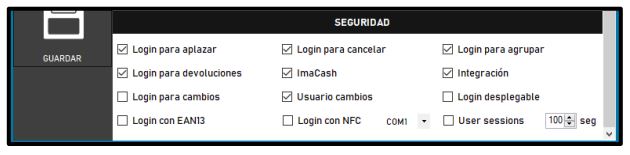
- Login to snooze: It will show the login screen when you try to snooze.
- Login for returns: Enables login for returns depending on the selected option.
ImaCash: It will request login for returns that belong to ImaCash itself.
Integration: It will request login for returns coming from the integrated software. - Login for changes: It will show the login screen when you try to access changes.
- Login with EAN13: Users must use a barcode to authenticate.
- Login to cancel: It will show the login screen when you try to cancel sales.
- User Changes: Will request a user when a change is made
- NFC Login: This function allows you to activate the use of NFC devices. We must mark the location of the port where it is connected in the drop-down menu for correct communication.
- Login to group: It will show the login screen when you try to group sales.
- Login dropdown: It will show a dropdown in the login to choose the user.
- User Session: Allows us to control the length of time the sessions last from when we set the password, to avoid constantly setting the password since we register.
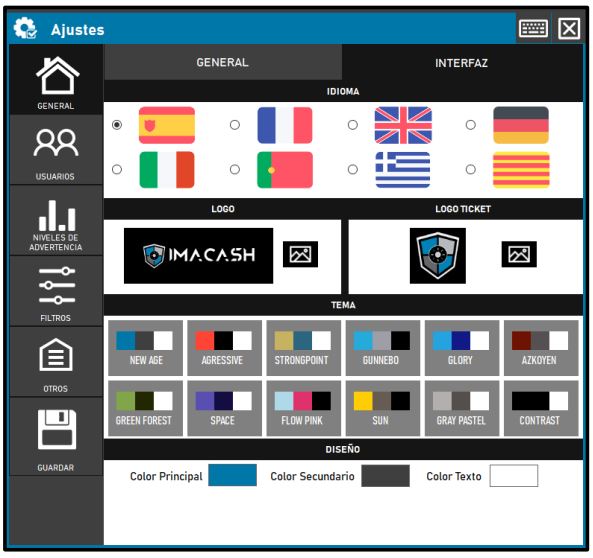
- Language: Changes the possibility of choosing the language.
- Logo: Select the “Image to be represented by the client.
- Logo Ticket: Select the “Image to appear on the tickets.
- Theme: Allows you to select “Preset themes to change the visual appearance of the ImaCash.
- Design: Allows you to change the visual appearance at the color level of the ImaCash.
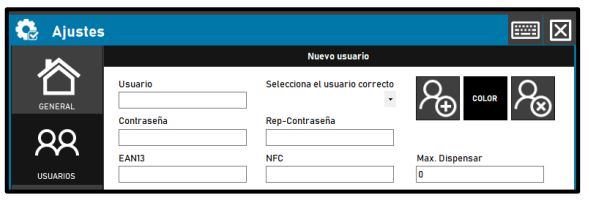
- User: The name that will appear in transactions. It is recommended to always use the same name as the integration field it is linked to.
Linked user: Appears next to the user and links integration users with ImaCash. - Password: You can set the password for the user.
Rep-Password: We will verify the password - EAN13: You can configure the User to register using a barcode reader.
- NFC: You can configure the User to register using an NFC reader.
- Color: We can select a color for that user so that when the sales appear it is easier to recognize them.
- Max. Dispense: Allows you to mark the maximum amount of cash that user can dispense. By default it is unlimited.
- Permissions:
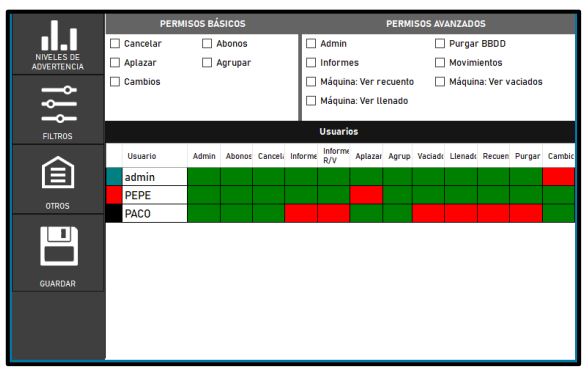
Basic Permissions: Allows users to access common ImaCash functions:
- Cancel: Cancel Sales.
- Defer: Allows the user to defer sales.
- Changes: Allows the user to make changes.
- Subscriptions: Allows you to make subscriptions.
- Group: Allows the user to group transactions.
Advanced Permissions: Allows users to access specific functions:
- Admin: Provides administrator permissions
- Reports: Allows the reports section to be viewed.
- Movements: Allows you to view the movements
- Machine: View emptying operations: Allows machine emptying operations to be viewed.
- Machine: View refills: Allows machine refill operations to be viewed.
- Machine: View count: Allows the machine count to be viewed.
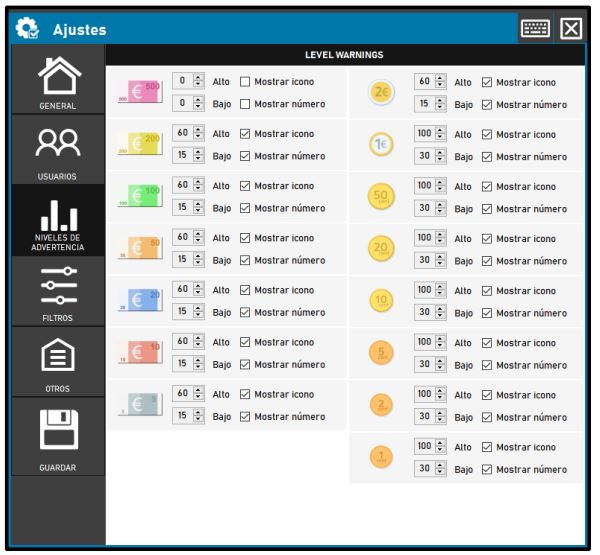
- Warning Levels:
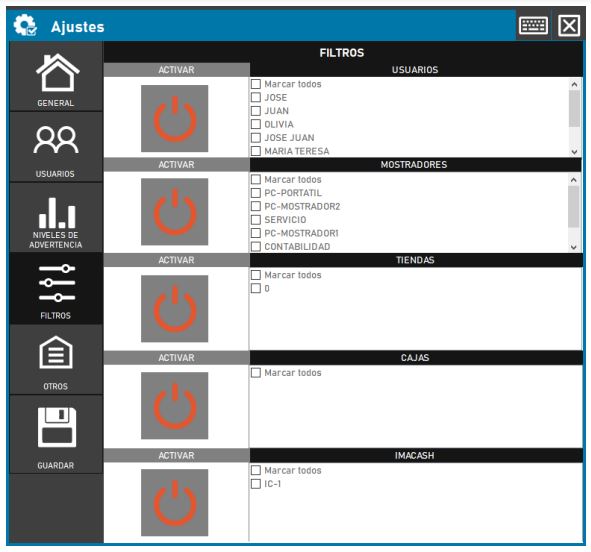
• Filters:
Allows you to filter the sales of the users and counters you want to see:
• Save: Saves all modifications made in the “Preferences” menu
BBDD Purge (Database Purge)
Performs a total cleanup of the database from the indicated date backwards.
When pressing it, you must enter the corresponding “User” and “Password” and then
the following window will appear:
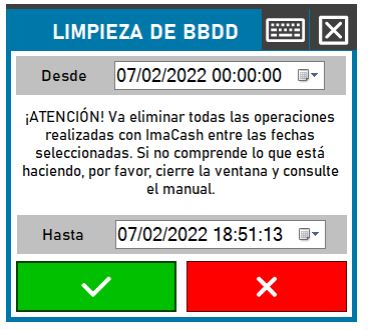
ATTENTION: We must bear in mind that “It will delete all the information in the BBDD from the date marked backwards.