The technician must fill in the “Server IP”, “Database name” and “Password” for the server where ICG is installed. The user name is usually the default one.
Steps to follow:
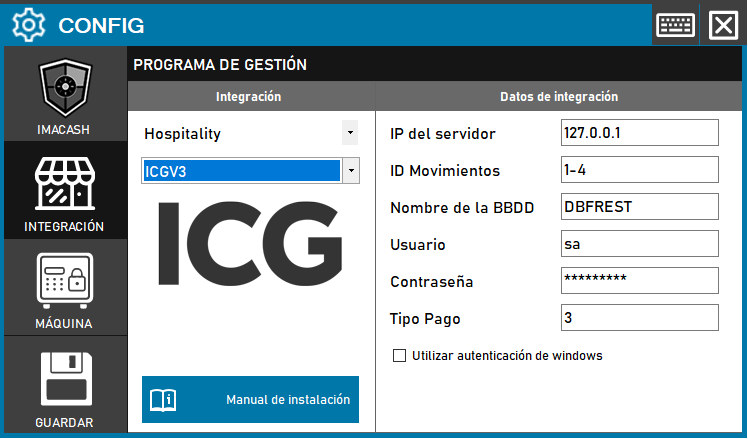
1. Open the integration settings:
- Go to CONFIG → INTEGRATION in your ImaCash system
2. Select the POS system:
- Select the «Hospitality» category
- Then select ICGV3 from the drop-down menu
3. Complete the connection details:
- Server IP: Enter the IP address of the server (example: 127.0.0.1)
- ID Movements: Configure cash entry and exit separated by “-” (example: 1-4)
- DB Name: Name of the database (example: DBFREST)
- User: user with access permissions (example: sa)
- Password: User password
- Payment Type: Payment type identifier (example: 3)
- Use Windows Authentication: Check this box if you want to use Windows Authentication.
4. Save the configuration:
- Click the SAVE button
Important: Check which version of ICG is installed on the client before selecting the correct integration variant.