Steps to follow
- Access the integration settings:
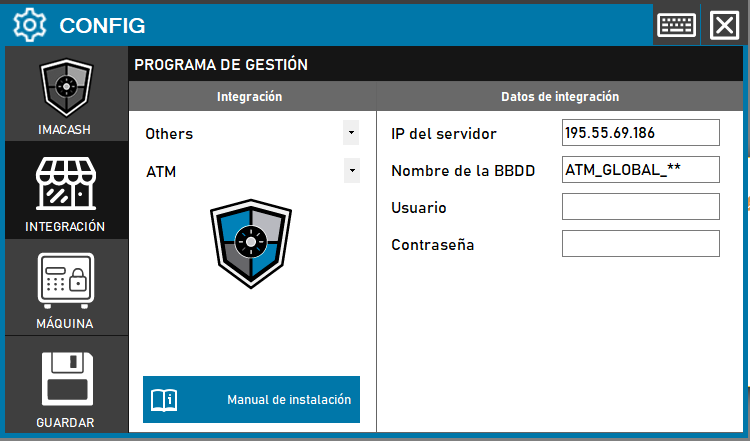
- Go to CONFIG → INTEGRATION in your ImaCash system
- Select the POS system:
- Select the POS category, in this case «Others»
- Next, select ATM from the dropdown menu
- Complete the connection information:
- Server IP: Enter the IP address of the server where the ATM Hospital database is installed (example: 195.55.69.186)
- Database Name: Name of the database to be accessed (example: ATM_GLOBAL_**)
- User: User with access permissions to the database
- Password: database user password
- Save the configuration:
- Click the SAVE button (save icon) at the bottom left
Important Note: The database name depends on the specific database to be accessed. The username and password fields may vary depending on each ATM Hospital facility.